Thursday, March 18, 2010

Bug with, Task Changed mail sent for First Approver after editing the approval Task in case of Workflow

I recently developed a two level approval workflow for leave approval.
During the flow of the workflow the workflow will sent an email to the first approver (ie. Team Leader) indicating that task has been assigned for you. While the Team Leader clicks on the link it will open the approval form and the TL can choose Accept or Reject. If the TL approves the leave ,a task will be assigned for the second Approver ( ie Manager) and it goes on..

In this case after the first approver approves or rejects (after editing the task) an email will be sent for approver indicating that the task has been changed.

This gave a heavy headache after some searching found a way to stop ..
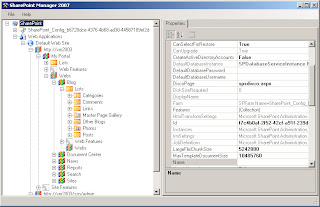
Its by the use of the Sharepoint Manager 2007.
Not only to stop the email sending but also a powerfull tool for MOSS.

After downloading and running the exe file the Sharepoint Manager will display all the site collections and all the things inside you sharepoint.


Steps For clearing the issue:

  • Run the sharepoint Manager.
  • Goto your corresponding site and then to the site collection.
  • Click on the Alerts Collections it will display all the list of alerts which have been added.
  • In that find the task for the workflow email alert.
  • Double Click on it in the right hand it will display its property in that there will be a field called Event Type. By default it would be All change it to only "ADD"..

Email will be sent only for the task adding and not in case of task change..

Download Link is Sharepoint Manager 2007
Reference Link :http://vspug.com/keutmann/2006/11/01/sharepoint-manager-2007/

Make a Tiny Calendar

Since long in sharepoint server 2007 sites we might have been using the calendar.. But its too crucial to see the calendar in a gigantic way.. So inorder to display it in a handy way there is a way by using Content Editor Webpart.

Just to add a simple script in it and display the calendar as to the desired size.

Just add a calendar in a web page and under it add a content editor web part.
In the content editor web part add the following code...

<style type="text/css">

/* Tiny Calendar */

/* Remove week blocks */
.ms-cal-weekempty {display:none;}
.ms-cal-week {display:none;}
.ms-cal-weekB {display:none;}
/* Shrink cells */
.ms-cal-workitem2B {display:none;}
.ms-cal-noworkitem2B {display:none;}
.ms-cal-nodataBtm2 {display:none;}
.ms-cal-todayitem2B {display:none;}
.ms-cal-workitem {font-size:0px;}
.ms-cal-muworkitem {font-size:0px;}
.ms-cal-noworkitem {font-size:0px;}
.ms-cal-nodataMid {font-size:0px;}
.ms-cal-todayitem {font-size:0px;}
/* thin out header */
.ms-cal-nav {display:none;}
.ms-cal-nav-buttonsltr {display:none;}
.ms-cal-navheader {padding:0px;spacing:0px;}
.ms-calheader IMG {width:15px;}
/* Abbreviate weekdays */
.ms-cal-weekday {letter-spacing:6px; width:22px; overflow: hidden;}
</style>


Click the ExitEditmode ... Thats it... We have got it...